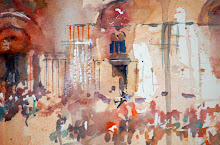
Primrose Shapes
I have had some wonderful emails from readers of my blog thanking me for my primrose step by step which has made me feel so happy. For me, painting is sheer joy. To keep that pleasure to myself would seem selfish. I honestly love working in watercolour so much and if I can inspire others to enjoy this fantastic feeling, I am thrilled. I did have one email from an established artist who is a friend of mine, asking why I am giving tuition for free online. They too paint flowers, and prefer for everyone to pay for workshops and all forms of tuition. But the way I see things is that nature is free. It is all around us and we can enjoy it, if we choose to. I couldn't paint primroses without seeing their beauty naturally. I have waiting lists for places on my workshops and I know not everyone is able to get a place this year, nor can everyone travel to see me. So I am aiming to keep enthusiasm as high as I can by sharing on my blog I also strongly believe that not everything in life should come with a price tag!
So lets' move on with more stages of working towards creating fabulous watercolours of primroses! You should by now have practised washes which is the first stage. But on top of these washes you are going to work in two ways.
A) You are going to paint flower shapes like the ones above.
B) You are going to work negatively within your washes to give the illusion of the primroses in the composition which is a lovely way to work. You will make flowers without even painting them!
At the end of this exercise we put everything together and see what your results are in my final stage of this painting tutorial. So lets look at painting positive flower shapes first.
Painting Primrose Shapes.
Stage 1.
Do study my text and images in this blog post because your taking time to get this part right will lead to a wonderful result when you work on your main piece.
1) Have several scraps of paper.
2) Have your primrose shades ready on your palette.
3) Work with a size 10 brush only
Now the exciting part!
4) Paint some primroses as you think they look. Study the petal shapes, they have lovely, almost heart like edges at the outer petal. Look at my flowers in the image below all painted ine one simple colour. Simplify, don't complicate your work. Keep it clean and fresh in this exercise.
5) Have your flower shapes facing different directions for variety and added interest.
6) Don't have them all the same, paint some half flowers too!
Painting Primrose Shapes.
Stage 2.
Adding Centres.
When your shapes are dry you can add a stronger yellow for the centre of each flower. Even with little detail you should be able to easily recognise the flowers as primroses. If you can't please keep practising as you will definitely get lost on the next and more complicated stage.
Primrose centres added to flower shapes
I have allowed my "centre colour" to flow to the petal edge on some flowers to create interest. I don't want any two looking identical!
Once you have two or three scraps of paper with beautiful primrose shapes on you are ready for the next and final stages. Please take your time on this part as it really helps you to get to know your subject. You can't paint anything well unless you understand how it is formed.
For readers of my blog who aren't able to see real primroses here is a photograph to help you paint this tutorial.
Primroses from my garden
.


2 comments:
Thank you for this mini workshop! Its much appreciated as I cannot travel for a physical one, nor could I afford to attend if I could travel.
The argument over whether to charge for knowledge or not is a difficult one. I don't charge to teach; my best friend and guild do, and I don't resent them getting the money. I have also been paid to give a workshop. I firmly believe in paying it forward, and if I can inspire someone by giving a little bit of my time, then hopefully they will also pay it forward, and I feel that I have "paid" the person who so generously gave their time to me.
There are some things money simply cannot buy; inspiring others to be creative is one of them. If the people you inspire are interested enough they will buy books, dvds, and attend workshops to further their knowledge, so no-one misses out. Your tutorials may well create another student for your friend, which is income he/she would not have had if you had not given your free tutorial.
So once again thank you for your hints and tips. I may not be able to attend a class in person, but I do have your books, and once I have caught up with my reading, your dvd is on my wishlist.
THANK YOU!
Post a Comment